9. Advanced Features
In this chapter we provide additional information on some of the neoVI’s new and advanced features.
Note that some of these features are not yet currently implemented in the neoVI’s, but their capabilities will be provided in future firmware upgrades, at which time this manual will be updated to explain their use.
9.1. neoVI API
The neoVI’s device comes with support for a full API that allows you to control the device from other software packages or custom-written software. For instructions on using the API, please consult its documentation on the Intrepid website at: https://docs.intrepidcs.com/neovi-api/.
9.2. USB Host
The neoVI’s device comes with a USB host port that allows other devices to be plugged into it (see Figure 6 in Section 3.3). Due to the difficulties associated with driver development, this port is intended for specific devices rather than general purpose use. It is especially designed to work with devices such as the Intrepid neoVI MIC microphone/trigger pendant, or the RAD-Moon (as seen in Section 6.3)
9.3. neoVI FIRE 3 COMPUTE Compute Module & Edge Operations
Headless Operation: The neoVI FIRE 3 COMPUTE supports high-performance headless operation, allowing it to function as a standalone test station or data logger without a connected PC. While traditional adapters only capture data, the COMPUTE model can process it in real-time, enabling the execution of Python scripts, AI models, and custom logic directly on the device. Users can manage the device remotely via SSH or a simple web interface hosted on the internal Raspberry Pi. This capability allows for autonomous tasks such as running full diagnostic test suites, executing Restbus simulations, or simulating complex gateways.
- Storage: To support data-intensive applications like video, lidar, and CAN FD logging, the device features significantly expanded storage options. The storage architecture includes:
eMMC Flash: 64GB of onboard eMMC flash memory on the CM5 for fast boot and system operations.
SD Card Slots: Two full-size SD card slots (SD 3.0 compatible) supporting up to 2 terabytes of total storage. A 64GB SD card is included as standard.
NVMe SSD: A user-replaceable M.2 NVMe 2.0 SSD slot supporting drives up to 4TB, providing high-speed access for massive datasets.
Connectivity: The neoVI FIRE 3 COMPUTE is designed for versatile remote access and fleet management.
Wi-Fi: It features internal dual-band 802.11a/b/g/n Wi-Fi for Wireless neoVI Application. Users can software-select between the internal antenna or an external antenna for improved range. CM5 shipped with a unit (CM5008064) doesn’t have a WiFi connectivity option, please purchase a separate wifi usb adapter to use it with the Raspberry Pi OS.
Cellular: For extended remote connectivity, the device supports the optional RAD-4G modem accessory, adding external cellular capability.
Security: All communications with the Wireless neoVI cloud are secured using MTLS.
9.4. Configuring AWS IoT Core Setup
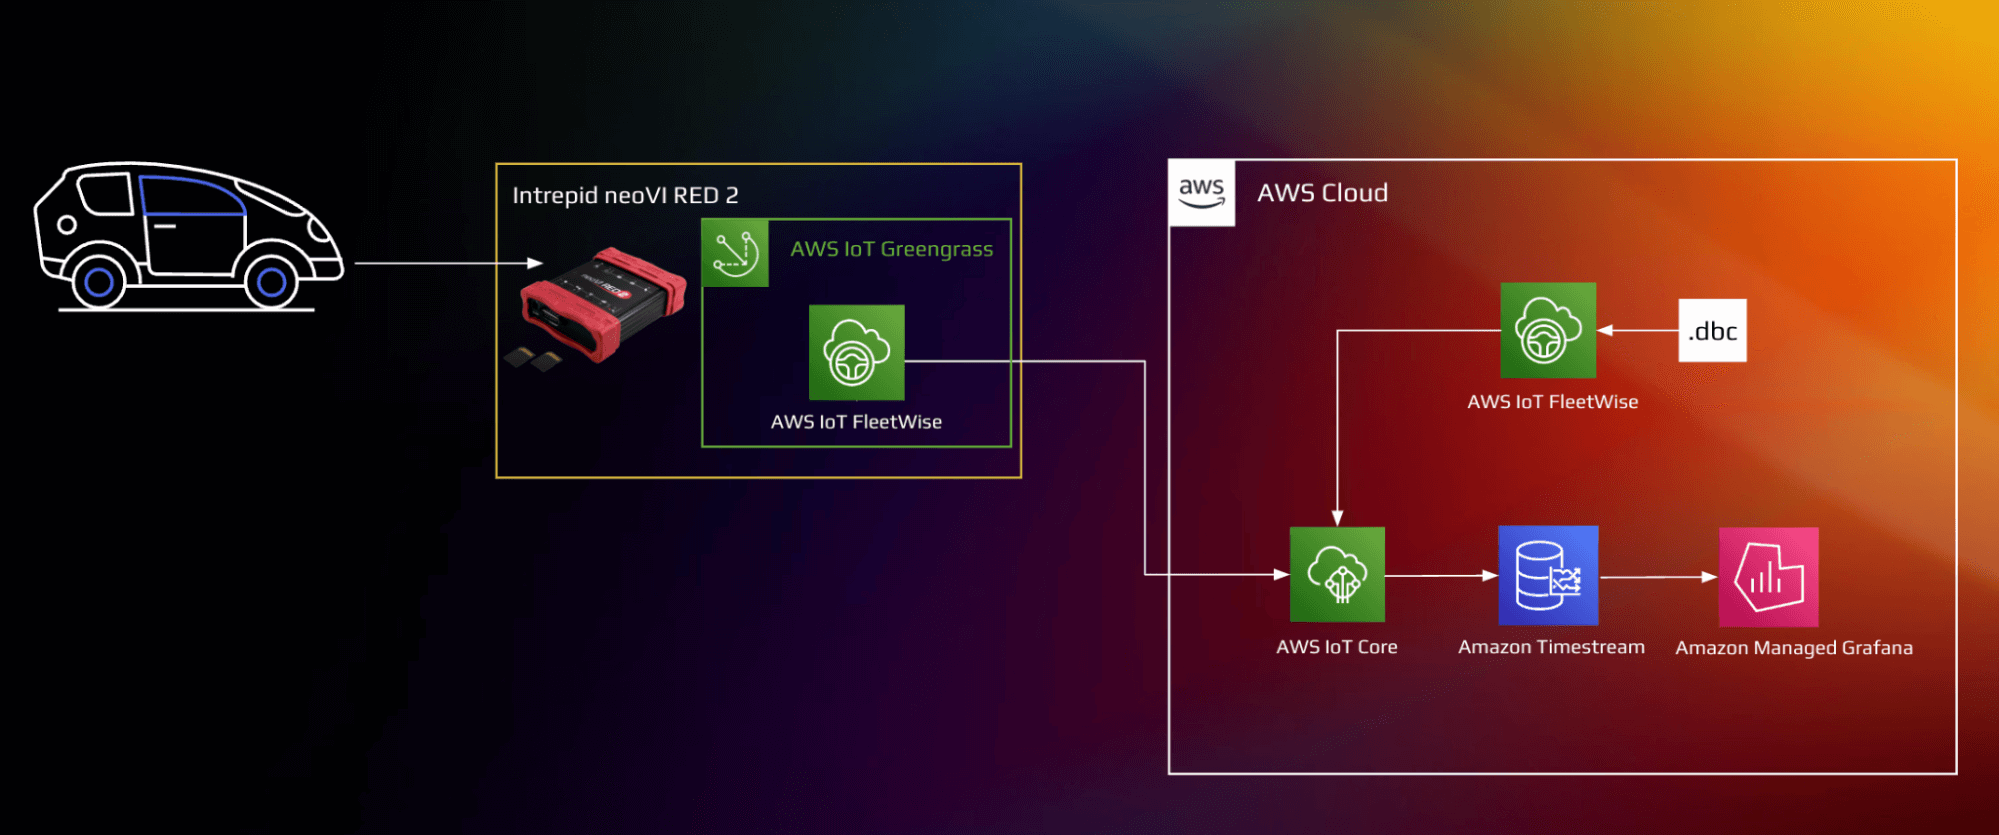
With the integration of AWS IoT FleetWise into our neoVI Red 2 data logger support, our customers will be able to utilize the same hardware for in-vehicle data logging while taking advantage of the IoT capabilities offered by FleetWise. Key advantage of AWS IoT FleetWise is its ability to integrate with Intrepid Data Loggers, providing automakers with the power of wireless and standalone logging capabilities to analyze data in real-time and make informed decisions about their fleets.
9.4.1. Configure your device to connect to AWS
Create resources in AWS IoT
Refer to the online AWS documentation at Create AWS IoT Resources. Follow the steps outlined in these sections to provision resources for your device:
Pay special attention to the Notes.
For more information, refer to the AWS online documentation on Troubleshooting AWS IoT.
9.4.2. Set up your development environment
Required Software:
Vehicle Spy Enterprise
Vehicle Spy Enterprise is a single tool for diagnostics, node/ECU simulation, data acquisition, automated testing, and in-vehicle communication networks bus monitoring.
For introduction, tutorials, and documentations on Vehicle Spy Enterprise, please click here.
Please refer to this section of the documentation on how to setup your neoVI’s device Software Setup.
9.4.3. Setup your AWS account and permissions
If you do not have an existing AWS account and user, refer to the online AWS documentation at Set up your AWS Account. To get started, follow the steps outlined in the sections below:
Pay special attention to the Notes.
9.4.4. Set up device hardware
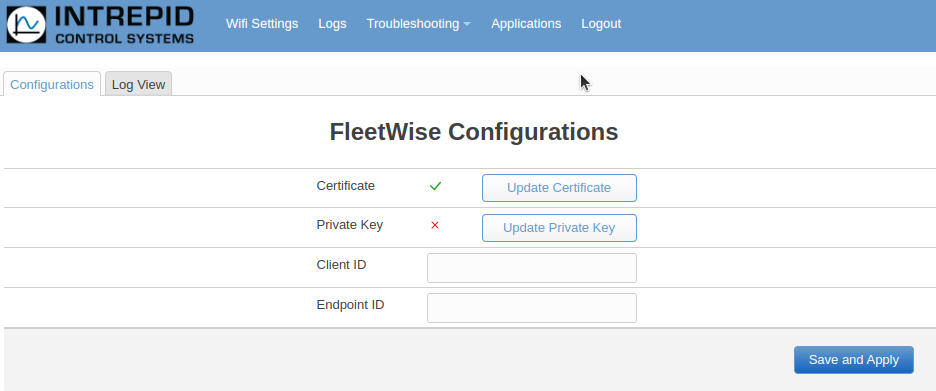
To set up your device to work with AWS Fleetwise, first visit - http://192.168.200.2/ and type in the username and password provided by Intrepid Control Systems. Contact Intrepid Control Systems for login information at https://intrepidcs.com/support

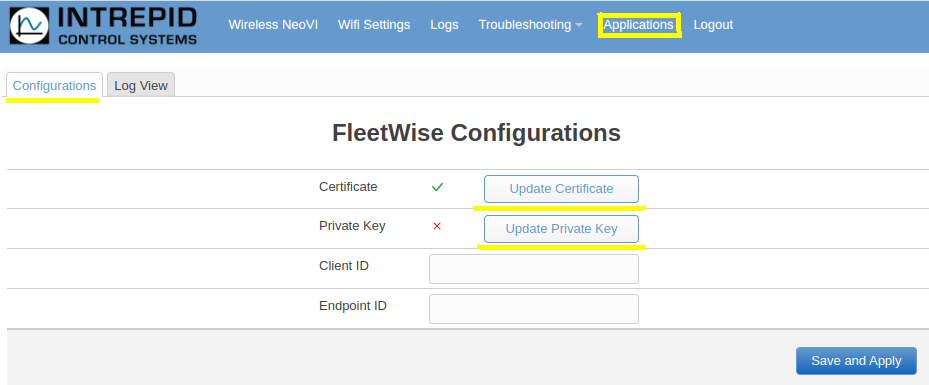
Landing page should be FleetWise configurations. To navigate there, click the Applications menu. Choose the Configurations tab.
To use AWS CLI with aws iot create-keys-and-certificate , follow these steps:
Install the AWS CLI on your local machine by following the instructions in the AWS documentation.
Open a terminal or command prompt and enter the following command to create a certificate, private key, and public key:
aws iot create-keys-and-certificate –region <REGION (us-east-1)> –set-as-active –certificate-pem-outfile “certificate.pem” –private-key-outfile “private-key.key”
Note that you will need to replace <REGION (us-east-1)> with the region in which your AWS IoT service is located, and also provide the <ENDPOINT URL> of your AWS IoT endpoint. To find the endpoint, navigate to the AWS IoT console and choose Settings in the navigation pane. The endpoint can be found under Device Data endpoint. It should look similar to this: xxxxxxxxxxxxxx-ats.iot.xxxxxxxxx.amazonaws.com
Once the command has finished executing, you should see two files in your current directory: certificate.pem and private-key.key. These files contain the certificate and private key that you can use to authenticate with AWS IoT.
Now that you have the certificate and private key, you can use them to authenticate your device or application with AWS IoT.
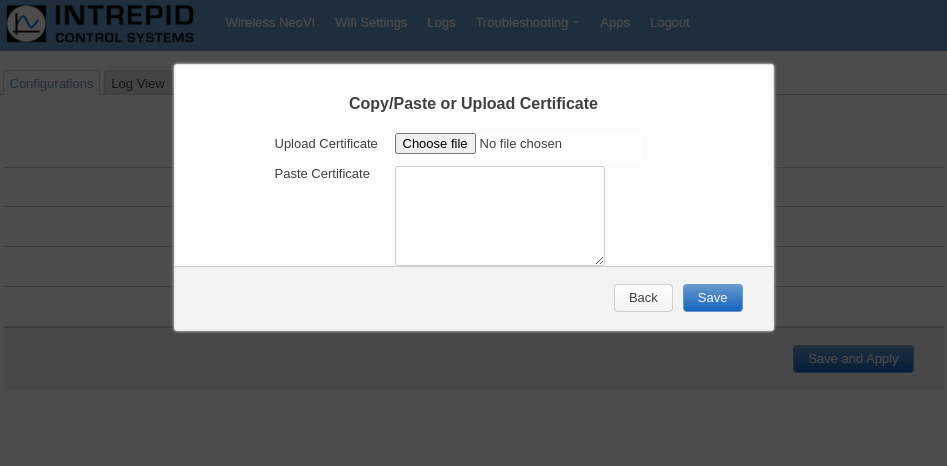
Upload Your Certificate and/or Private Key to the website. :
A green check ✔ means it exists
A red X means it does not exist
Add or Update Permissions:
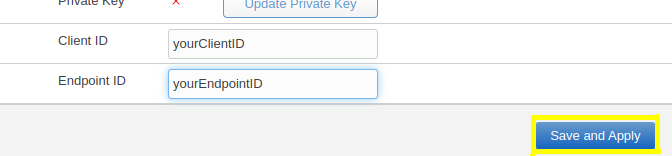
Update Client ID and Endpoint ID: Client ID and Endpoint ID values are unique to each device and are used to establish a secure connection between the device and AWS FleetWise. It is important to keep these values confidential and secure to prevent unauthorized access to your devices and data.
Type in the Client ID and/or Endpoint ID
Click ‘Save and Apply’
To find Client ID and/or Endpoint ID, you need to log in to your AWS account and navigate to the AWS FleetWise console.
In the left navigation menu, click on “Fleets”.
Select the fleet for which you want to find the Update Client ID and Endpoint ID.
Click on the “Devices” tab to see the list of devices in the fleet.
Find the device for which you want to find the Update Client ID and Endpoint ID and click on its name to go to its details page.
On the device details page, scroll down to the “Connection Details” section.
In the “Connection Details” section, you will find the Client ID and Endpoint ID values.
You can copy and use these values as needed in your AWS FleetWise application.
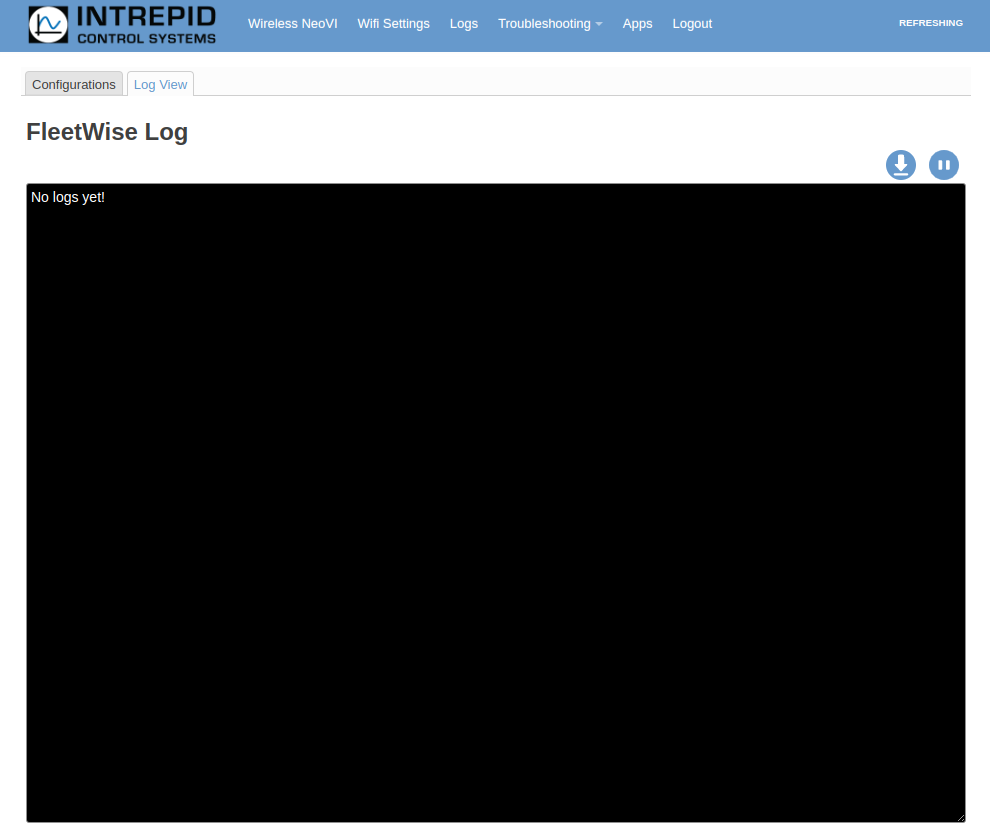
Troubleshooting: Select Log View tab
Log will be filtered to show FleetWise related messages
End-user can confirm that a device is able to communicate with AWS IoT Core. Here are a few methods:
Flashing Blue/Green LEDs : If your intrepid device is flashing blue/green LEDs then the Intrepid device is able to communicate with AWS IoT Core.
Fleetwise Log screen: You can see your intrepid device is publishing data, the end-user will be able to see it in real-time in the console. This method can be useful for initial testing and troubleshooting.
AWS IoT Console: The end-user can log in to the AWS IoT console, navigate to the “Test” section, choose the MQTT Test client, and subscribe to the MQTT topic that the device is publishing to. If the device is publishing data, the end-user will be able to see it in real-time in the console. This method can be useful for initial testing and troubleshooting.
There are several methods that an end-user can use to confirm that a device is able to communicate with AWS IoT Core. The best method will depend on the specific use case and the available resources.
For more information, refer to the AWS online documentation on Troubleshooting AWS IoT.